Nothing says summer quite like a juicy, golden ear of corn on the cob. Whether it’s a weekend cookout, a picnic at the park, or just a laid-back weeknight dinner, boiled corn is a warm-weather classic that satisfies both kids and adults. Still, while it’s simple to make, boiling corn just right requires a little know-how to avoid ending up with soggy or bland results. This guide covers everything you need to know—from how to choose the best corn to the exact cooking time and ways to make it bursting with flavor.
How to Choose the Freshest Corn
Before boiling, start with the best possible ears. The quality of the corn you choose will make a big difference in taste and texture. Use these tips to pick corn that’s fresh and flavorful:
Look at the Husk: Choose corn with bright green husks that cling tightly to the cob. Avoid ears with dry, yellowing, or brown husks.
Feel for Full Kernels: Run your hands along the corn. You want to feel plump, uniform kernels from top to bottom. Skip any ears with bald patches or uneven rows.
Check the Silk: The silk coming out of the top should be slightly sticky and light in color. Brown, dry silk is a sign that the corn is past its prime.
Peek if Allowed: If your grocery store permits, peel back a small section of the husk to see the kernels. Look for juicy, full kernels with a milky sheen—not dry, shriveled, or discolored ones.
Once you’ve found perfect corn, it’s time to get the boiling technique down.
Perfect Timing for Boiling Corn
Boiling may sound easy, but timing is everything. Too little, and the kernels are tough. Too much, and they turn mushy and lose their natural sweetness.
Avoid Overcooking: Don’t boil corn longer than 8–10 minutes. Prolonged boiling causes the kernels to break down, leaving them soft and flavorless.
Don’t Undercook: Boiling for less than 5 minutes often results in chewy, starchy corn. The sweet spot is typically 6–8 minutes, depending on the size and freshness of the corn.
Step-by-Step Instructions to Boil Corn the Right Way
Step 1: Prep the Corn
Shuck each ear completely, removing the husks and all the silk. Rinse under cool water to wash away any leftover strands.
Step 2: Boil Water
Fill a large pot with water, enough to cover the corn fully. Bring it to a rolling boil over high heat.
Step 3: Season the Water
Enhance the flavor by adding 1–2 tablespoons of salt and 1–2 teaspoons of sugar per gallon of water. The sugar brings out corn’s natural sweetness, and the salt boosts overall flavor.
Step 4: Cook the Corn
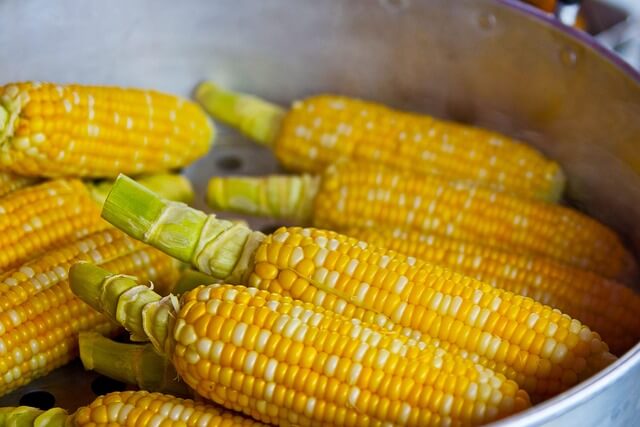
Carefully lower the ears into the boiling water. Cover the pot and let the corn cook for 5–8 minutes.
Step 5: Check for Doneness
Insert a fork into a kernel. If it pierces easily and feels tender with a slight pop, it’s ready.
Step 6: Drain and Serve
Remove the corn with tongs, let it drain, and serve hot with your favorite seasonings.
Add Flavor with Creative Toppings
Boiled corn is naturally sweet and delicious, but a few extra touches can take it to the next level. Try these flavor-boosting additions:
Classic Butter and Salt: Melted butter and a pinch of salt are timeless. They complement corn’s sweetness with rich, savory notes.
Herb-Infused Butter: Mix butter with herbs like parsley, thyme, dill, or cilantro. This adds freshness and an aromatic boost.
Cheesy Goodness: Sprinkle grated Parmesan, crumbled feta, or shredded cheddar on top while the corn is hot so it melts into every bite.
Spice It Up: Dust your corn with chili powder, smoked paprika, or cayenne. Add a squeeze of lime for a zesty finish.
Mexican-Inspired Street Corn: Spread mayonnaise on the corn, then top with Cotija cheese, chili powder, and a splash of lime juice.
Garlic Parmesan Coating: Combine minced garlic, melted butter, and grated Parmesan, then brush it on for an indulgent, savory experience.
Conclusion
Boiling corn the right way means starting with fresh, plump ears, timing the cook just right, and finishing it off with flavorful toppings. Whether you prefer it simply buttered or fully dressed in herbs and spices, mastering this summer staple will turn any meal into a seasonal celebration.