Raised garden beds are a game changer. They make gardening easier, neater, and more productive. But buying a ready-made raised bed? That can get expensive fast.
The good news? You can build your own raised garden bed at home with simple tools and materials—even on a tight budget. And the best part? You can do it in just one weekend.
Here’s how.
Why Go for a Raised Bed?
Before we get to the how, let’s talk about the why.
Raised garden beds are great because they:
- Improve soil drainage
- Warm up faster in spring
- Reduce weeds
- Are easier on your back and knees
- Help keep pests and critters away
- Look clean and organized in small spaces
They’re perfect for beginners, urban gardeners, and anyone who wants a low-maintenance garden setup.
Also Read Recycle Old T-Shirts Into Something Cool (Easy DIY Projects You Can Do at Home)
Plan Before You Build
Pick the Right Spot
Choose a flat area that gets at least 6–8 hours of sunlight per day. Make sure there’s access to water nearby. Avoid placing it under trees (shade + roots = trouble).
Decide on Size
Standard beginner-friendly size: 4 feet wide x 8 feet long x 12–18 inches high.
- 4 feet is wide enough for plenty of plants, but narrow enough to reach across.
- Keep the bed no longer than 8 feet unless you add extra support in the middle.
- Height matters too. Deeper beds mean more root space, but cost more to fill. If you’re on a budget, 12 inches is a great start.
Materials You’ll Need (Budget-Friendly Options)
You don’t need fancy treated lumber or professional tools. Here’s what works best for a cheap, durable build:
Wood Options (Pick One):
- Cedar (best, naturally rot-resistant, but pricey)
- Pine or Fir (cheap, lasts 5–7 years)
- Upcycled Pallets (free, but make sure they’re marked “HT” for heat-treated, not chemically treated)
Other Materials:
- Wood screws (2.5″ exterior-grade)
- Drill or screwdriver
- Level (or eyeball it)
- Tape measure
- Landscaping fabric or cardboard (for the bottom layer)
- Optional: Corner brackets for extra strength
Step-by-Step: How to Build It
Step 1: Cut Your Boards
If you’re making a 4×8 foot bed, you’ll need:
- Two boards at 8 feet long (sides)
- Two boards at 4 feet long (ends)
Ask the hardware store to cut them if you don’t have a saw. Most will do it for free.
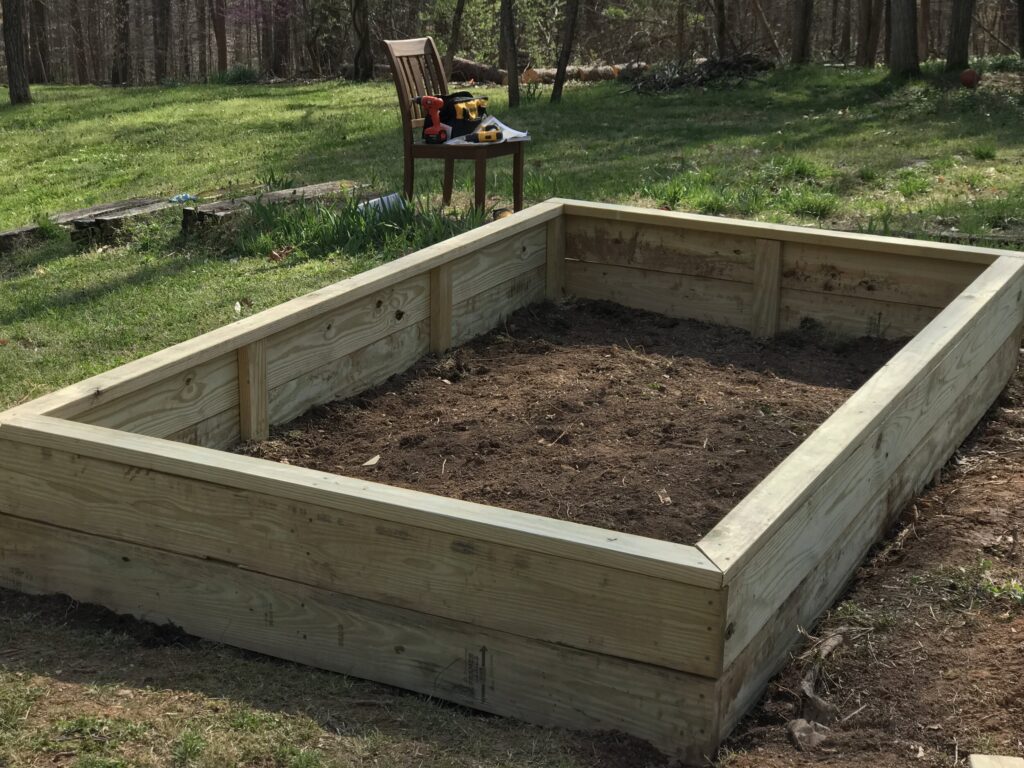
Step 2: Assemble the Frame
- Stand the boards up to form a rectangle.
- Use your screws to attach the corners—two or three per side.
- Use corner brackets if you want extra durability (optional).
Pro tip: Build on flat ground or patio so your bed isn’t wobbly.
Step 3: Prepare the Ground
- Clear the grass and weeds where your bed will go.
- Lay down cardboard or landscaping fabric. This blocks weeds and grass from growing through.
Step 4: Place and Level the Bed
Set your wooden frame on the prepared area. Use a level to check the sides, or just eyeball it. Adjust with small rocks or soil if needed.
Step 5: Fill Your Raised Bed (Budget Hack Inside!)
Filling the bed can get expensive if you only use garden soil. Instead, try this layering method:
1. Bottom Layer (Free Stuff):
- Twigs
- Leaves
- Old newspaper
- Grass clippings
2. Middle Layer:
- Compost
- Manure
- Food scraps (lightly broken down)
3. Top Layer:
- A mix of garden soil and compost
This method saves you money and creates rich, organic soil as it decomposes.
What to Grow in Your New Bed?
Raised beds are great for:
- Tomatoes
- Lettuce
- Spinach
- Carrots
- Peppers
- Herbs like basil, thyme, or cilantro
- Strawberries
Keep taller plants (like tomatoes or sunflowers) on the north side so they don’t block sun from the smaller ones.
Extra Tips for First-Time Builders
- Don’t overfill the bed. Soil should sit 1–2 inches below the top.
- Water deeply after planting. Raised beds dry out faster than in-ground gardens.
- Add mulch to the top to reduce watering needs and suppress weeds.
- Consider installing a simple drip line or soaker hose if your bed is large.
Cost Breakdown (Estimated):
| Item | Cost (Approx.) |
|---|---|
| 4 Pine Boards | $20–$40 |
| Screws | $5–$10 |
| Drill (or screwdriver) | Already at home |
| Compost & soil | $20–$50 |
| Cardboard | Free |
Total: Around $50–$100 depending on what you already have
Conclusion: It’s Doable (and Totally Worth It)
Building a raised garden bed in your backyard doesn’t have to be expensive or complicated. With a weekend, some basic tools, and a little effort, you can build your own growing space that will serve you for years.
Whether you’re starting small or dreaming big, this project helps you connect with your food, get outdoors, and enjoy gardening more than ever.
So grab that drill, find some scrap wood, and start building. Your plants—and your wallet—will thank you.
FAQs
Q: Can I build a raised garden bed without tools?
Yes, you can buy snap-together kits, but they cost more. If you have a drill or screwdriver, DIY is cheaper.
Q: What’s the cheapest wood for raised beds?
Pine is the most budget-friendly. Just seal it or expect to replace it after a few seasons.
Q: Do I need to line the bottom?
Lining with cardboard or landscape fabric helps stop weeds and grass. It’s optional but recommended.
Q: How deep should a raised bed be?
12–18 inches is enough for most vegetables. Root crops like carrots prefer at least 10 inches of soil depth.
Q: Will the wood rot over time?
Yes, untreated wood will eventually rot. Using cedar or sealing the wood helps it last longer.